Couch Update 2020

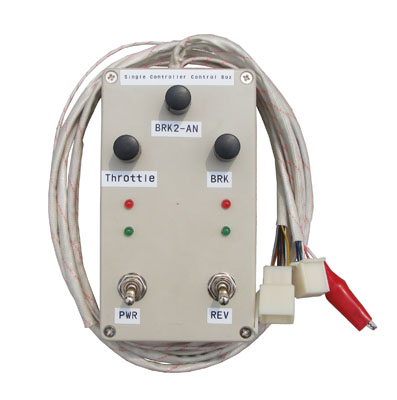
Just remembered I had this blog actually. A lot has happened to the couch in the nearly 6 years since the last update. The control boxes as two separate devices (one for each motor) made it… Interesting to drive. Though it was also definitely a bonding experience with friends as the cables also weren’t long enough for one person to control both sides at the same time if two people were riding the couch. So in Jan 2016 the next upgrade was adding an Arduino Uno connected to a wireless Xbox 360 controller. Yes, the couch is now remote controlled!

That made life a lot easier when trying to drive it around people. It also tripped quite a lot of people out as I drove friends around on it with apparently no one in control…

Test setup before everything got tided up. Note the big red “Oh fuck” button. Got to have one of those.

For 2017 most of the work was in fixing the drive train… Making it easier to control meant we snapped axles more frequently. Turns out those motors have quite some torque.

2018 was time for an upgrade… It was finally time to add some shade by adding a roof, which was amazing… Especially when it rained. No pics sadly.

2019 it became clear that the drive train was just too much of a problem and needed to be solved…

2020… Time for a full rebuild. Out with the electric bike motors and chain driven two stage gear reduction we built from wood and hand tools. Out with the electric scooter wheels. Out with 2WD. In with… 4 x electric wheelbarrow wheels. And 4WD.

New wheels on the left…

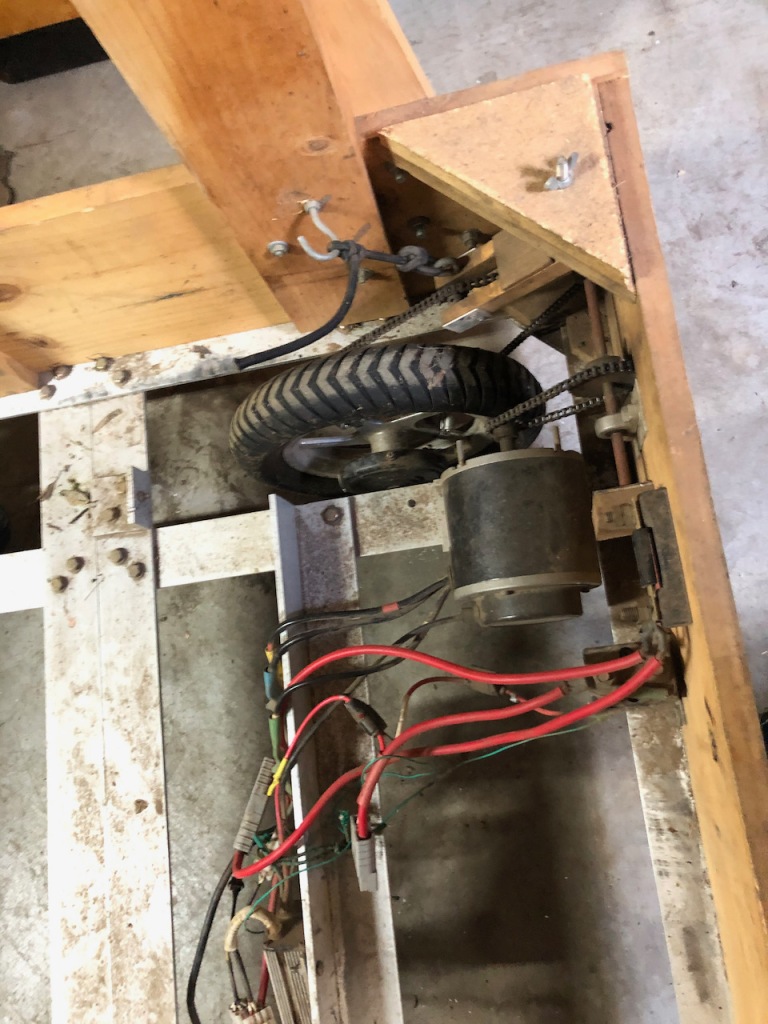
We had to shift a few struts to make room for the new wider wheels, but everything came together pretty well in the end.

New hotness

Unfortunately, the previous control circuitry won’t drive the new motor controllers… The input seems to be lower impedance, and the arduino PWM can’t drive it. Sad face. Ran out of time the summer to add the needed buffer circuitry, but that’s in progress. Not looking likely that festivals will feature much this summer though…

Couch Construction Retrospective – January 2015

At the end of Jan 2015 construction recommenced with a vengeance – Rainbow Serpent Festival was the end of this month.

We decided to move up from a 36V system to a 48V system for more power, got a  new motor controller (after I fried one in November) and finally got things up and running.

I had grand plans for the control system, but ended up using two Kelly Controller test boxes, much like this one:

KBS ControlBox

So one hand on each throttle knob…And the wires weren’t quite long enough so you could either sit in the middle of the couch with one arm stretched out to either side, or have one person controlling the left motor and one controlling the right…

The first attempt at driving down the driveway should have been videoed for posterity bad sadly it wasn’t… Imagine some 300KG+ of couch, batteries and people heading very quickly into some bushes… Still, no harm done.

We ended up having to turn the max speed on the controllers to the lowest setting – 30% I think it was. At that setting we would still move at a fast walk, but with a lot of communication between the two of us we could drive pretty well. Brakes are a problem though. The tiny band brakes built into the wheels do not work well enough. There’s a fair bit of power, but steeper inclines were still a challenge. It’s currently using a 14 tooth pinion and a 90 tooth drive sprocket – future plans for a second stage of gear reduction.

Here’s some video at 50% max speed:

And a picture of the couch in action at the festival (Thanks to Mojo Film for taking this shot):

10958716_739482546147696_8439380944141177066_n

Tech Specs

4 x 12V 60AH SLA Batteries

2 x Cyclone 2kW 48V brushless motors

2 x Kelly Controller KBS48101X (40A, 24-48V)

14:90 gear reduction, 12 1/2″ wheels.

Couch Construction Retrospective – November 2014

In November 2014 I returned to Melbourne and started working on the couch once more, in part thanks to my friend who had both carpentry skills (in which I am completely lacking) and a design in his head for how the “couch” part of this electric couch would work. At this point we discarded the idea of this being able to be disassembled and put into a car…

We started by building a wooden base on top of the aluminium frame to act as attachment point for the rest of the couch. We built this with such precision that it is simply press fit onto the aluminium frame. Stoked.

IMG_2901

We then built the back and bottom of the couch:

IMG_2903

And then started test fitting components:

IMG_2905

Bulk of the couch assembled, batteries in place:

IMG_2911 IMG_2906

At this point work on the electronics/electrics started in earnest, and I learnt a valuable lesson about pre-charge resistors – accidentally fried one of the motor controllers. So the best I could do at this point was test one motor. And it moved! A bit. Getting the motor lined up and the chain the right length was tricky. And the pinion kept slipping off the motor.

Another few months now pass before work could continue…

Couch Construction Retrospective – March 2014

So the electric motorised couch is actually built and functional. It was completed in January 2015, and was a ridiculous amount of fun at Rainbow Serpent (we literally completed the build, drove it down the driveway and back, threw the couch on a trailer and went straight to Rainbow.) But I’m getting ahead of myself.

I completely forgot to write any posts during the build, but I did take some photos, so I’m now going to go back and write a bit of a retrospective. Cast your mind back to March 2014…

In the original post I talked about my purchases. Well, with those in hand I first had to build a work bench, which was made out of two saw horses and a piece of plywood…. No garage for me to work in…

IMG_2039

I then set to work measuring and cutting the very thick aluminium angle with an angle grinder. It worked pretty well actually – a metal cutting mitre saw would have been nicer, but this was accurate enough.

Here is the frame cut to size – It needs to very very sturdy because who knows how many people might jump on it at a festival…

IMG_2032

The next step was drilling holes and bolting things together. Detail of the bolts – 8mm zinc coated with plastic washers to reduce galvanic corrosion. Actually the plastic washers aren’t shown here…

IMG_2033

From there we had to test fit the wheels, even though I hadn’t made the plates up to join the corners. Hence the clamps to hold it together. We may or may not have towed each other around on the frame just to see how it felt…

IMG_2053

Detail of the corner plates, with wing nuts on one side so it could be easily pulled apart. At this stage I was still aiming to make it fit in the back of my car…

IMG_2057

Looking at motor placement:

IMG_2065

A slightly dodgy but entirely functional motor mount, which was then bolted to the frame:

IMG_2067

This is about where the couch stayed for a while… Winter came, so it wasn’t so pleasant to work outside, plus it needed some thinking time about motor placement and design of the actual comfy part of the couch. And then I went to Thailand for three months to do my Divemaster course…

At this stage I also had a few worries about how steerable it would be… It didn’t turn easily.

Grand Plan: The Electric Shady Couch

It’s been a while. I’ve been obsessing mostly over travel until recently, when I saw the “Festival Couch” at Rainbow Serpent festival. Basic concept: take one couch, add wheels and a motor and you have transport around the festival plus a comfy place to sit. I’d seen it at Rainbow previously, but as I have a bit more time on my hands at the moment, the idea took hold a little more… It’s not original I admit, it’s been done a bunch of times according to the internet, but it will be a very interesting project for me.

I have the following goals:

  • Comfortable transport and seating for two people
  • Able to carry a smallish chilly bin (“esky” if you’re Australian… “Cooler” if you’re American) along with the two people if necessary. Doesn’t have to be as comfortable though 🙂
  • Made with primarily hand tools, as I don’t have a workshop
  • Transportable without a truck or trailer (my car doesn’t have a tow bar)
  • Solar powered. No one likes the noise of small petrol engines.
  • Has an awning/cover to provide shade… Critical at summer festivals.

With those in mind, I decided that instead of converting a normal couch (as I have seen others do) and adding wheels, I will build a frame out of aluminium angle and add cushions later. In this way I don’t have a heavy couch frame to move around (meaning it’s more efficient) and if I bolt the frame together (instead of welding) I can take it to pieces for transport. Plus I don’t have a welder. Or welding skills. Bolts I can do.

I am also going with a differential steering system – that is, a separate motor will control the left side drive wheel to the right side drive wheel. A bit like a tank. In this way I can avoid the complexity of a steering rack.

For the initial phase of construction I’m focusing on building the bottom plate – basically a rectangular frame with the wheels and motors mounted. I’m trying to do my spending in stages (just in case this is another Fad That Gets Boring) so the first stage is:

  • Two ~1.5kW electric motors from Cyclone (just arrived today – super fast delivery!)
  • Four wheels from a Schwinn Electric Scooter, which include drive sprocket and brakes. Buying this as a unit will save a fair amount of fabrication that I would have to pay a workshop for. I made all four wheels the same (even though I’m only planning to drive two of them) because it means I can make it 4WD later if I like, and also to get the band brake.
  • Equal angle aluminium – Alloy 6061-T6, 63.5mm x 63.5mm x 6.35mm. Based on some back of the envelope calculations drawing from the learnings of the single civil engineering paper I did at University over 10 years ago… This should be strong enough?
  • Flat bar aluminium – again alloy 6061-T6, 150mm x 6mm. This will be used for joining the angle aluminium at the corners, a bit like a nail plate.

Now to start building…